Welcome to our article about the Online Room Planner for Shopware, presented by WebiProg GmbH, your leading Shopware agency. In an era where online commerce and e-commerce continue to thrive, innovative solutions and tools are essential to enhance the customer experience and boost revenue. Our goal today is to provide you with insights into the world of the room planner as a plugin for Shopware and illustrate how this tool can elevate your e-commerce business to the next level.
Tasks and Objectives of the Room Planner for Shopware:
In a time when the online shopping process often needs to replace the in-person visit to a brick-and-mortar store, the question arises: How can we make the shopping experience for our customers as realistic and interactive as possible? This is where the Online Room Designer comes into play.
Customer Engagement and Satisfaction: One of the primary goals of the Online Room Planner is to make the shopping experience in your Shopware store as appealing and user-friendly as possible. With this plugin, customers can not only select products but also view and arrange them in virtual rooms. This creates an impressive and interactive shopping experience that enhances customer engagement and satisfaction.
Revenue Growth: By allowing customers to see products in a realistic environment, they gain a better understanding of size, color, and fit. This reduces returns and increases the likelihood of completing purchases. The Online Room Planner directly contributes to revenue growth.
Reducing Purchase Barriers: Often, customers hesitate to make online purchases because they are unsure if a product will fit into their living space. With the Room Planner, they can overcome these uncertainties by visualizing products in their own rooms. This reduces purchase barriers and increases conversion rates.
Customization and Personalization: The Room Planner allows customers to design rooms according to their preferences and customize products. This fosters customer loyalty and increases the likelihood of cross-selling and upselling.
In this article, we will provide you with detailed insights into the functionalities and benefits of the Online Room Designer for Shopware. We will also present some best practices and case studies to show you how successful e-commerce companies are already using this tool.
With our commitment to innovative solutions and our expertise as a leading Shopware web agency, we are confident that this article will provide you with valuable insights and inspire you to integrate the Online Room Planner into your Shopware store to delight your customers and boost your revenue. Enjoy reading!
General Requirements:
Responsiveness:
The constructor must function smoothly and be accessible on all commonly used devices. It is crucial that user-friendliness is ensured regardless of the screen size.
Update Capability:
To ensure the sustainability of your Shopware installation, the configurator must be developed as a plugin. It is essential to ensure that the Shopware system can continue to be updated without conflicts or disruptions caused by the configurator.
Optimized Loading Times:
Rapid deployment of the configurator upon loading is vital for enhancing user experience. Therefore, it is of great importance that the JavaScript code is efficiently and cleanly programmed to avoid long loading times. Optimizing loading times significantly contributes to user satisfaction.
Optimized Images:
When uploading images to the library, automatic optimization must occur to minimize server load. This is particularly important to maintain system performance and ensure the website runs smoothly.
Configurator Integration:
The configurator must be accessible via a clear and easily reachable link. Additionally, it should be seamlessly integrated into the shop, ideally as a separate section in the top menu. This ensures that customers can easily find and use the configurator.
Scope: FEATURES
- Portrait / Landscape:
Within the system, users are provided with the option to use both portrait and landscape formats for printing. Therefore, it is crucial that the end user can quickly select between portrait and landscape formats right from the initial step. This selection can be conveniently made through tabs.
Depending on the chosen orientation, be it portrait or landscape, the predefined design should already be visible. This allows the end user to immediately recognize the visual difference.
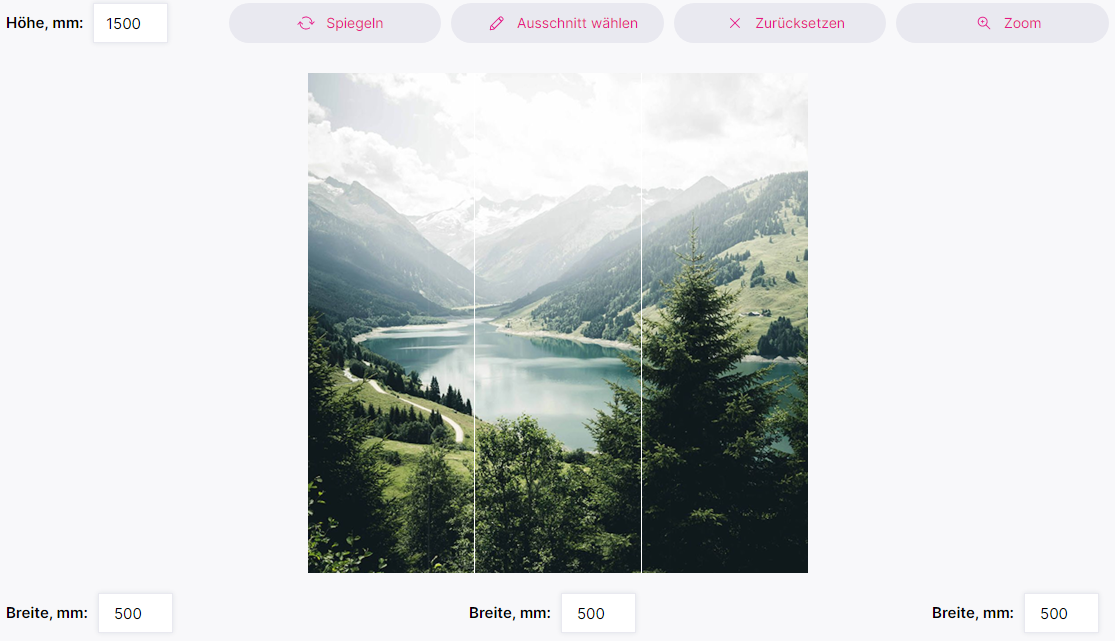
Example: Portrait Format:
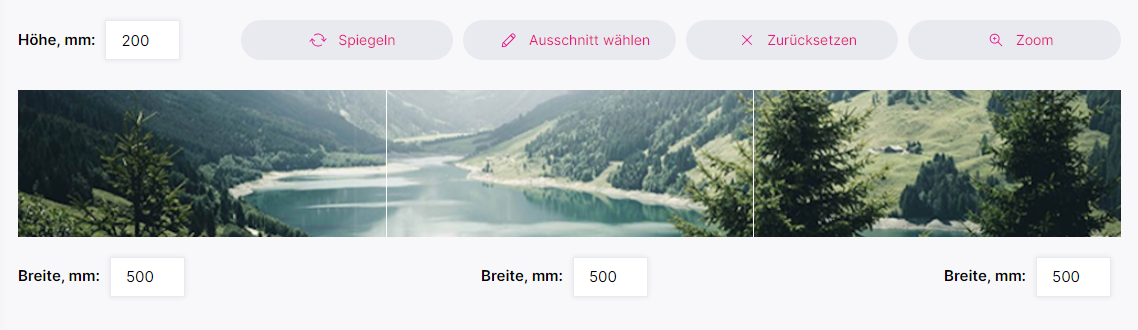
Example: Landscape Format:
- Designs
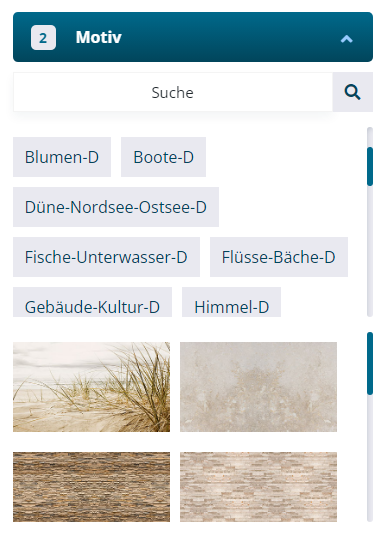
2.1. Image Gallery:
After the user has selected the desired printing format, they have the option to choose one of the designs from the image gallery. All designs are organized thematically and are stored in the backend according to the printing format. This facilitates easy management and editing of the designs to ensure they meet the user’s requirements and preferences.
2.2. Image Gallery Management
The administrator has comprehensive management options for image galleries:
Creating a New Image Gallery: When creating a new image gallery, the following steps are available:
– Assign a name.
– Set the price surcharge.
– Choose the format type.
– Delete the image gallery.
Editing an Image Gallery: When editing an image gallery, the following settings can be adjusted:
– Change the name.
– Modify the price surcharge.
– Alter the format type.
– Activate or deactivate the image gallery.
Each image gallery contains a collection of designs, with the following management options available:
Creating a New Design: When creating a new design, the following steps are available:
– Assign a name.
– Upload the image.
– Set the price surcharge.
-Choose the format type.
– Define the maximum/minimum crop.
– Delete the design.
Editing a Design: When editing a design, the following settings can be adjusted:
– Change the name.
– Modify the image.
– Adjust the price surcharge.
– Alter the format type.
– Change the maximum/minimum crop.
– Set the order of the design in the library.
– Activate or deactivate the design.
Note:
It is important to note that the printable image files are large (up to 150 MB). Nevertheless, the administrator must be able to download the file in its original format with all configured/defined dimensions on the order page in the admin area. Therefore, the appropriate image format must be defined: TIFF or SVG. This ensures an efficient process for the administrator.
- Selectable Options
Users have various choices at their disposal, including:
3.1. Material:
Users have the option to select the desired material to be used as a base for printing. A ToolTip is available above each option. By clicking on this ToolTip, the user receives detailed information about the current option. The information description includes both text and images and opens as a pop-up window.
(The ToolTip description could, for example, include the following: Material options, their properties, and visual differences to assist the user in their selection.)

Depending on the selected option, the configurator dynamically calculates the total price.
3.1.1. Material Management:
The administrator has extensive management options for materials:
Creating a New Material: When creating a new material, the following steps are required:
– Assign a name.
– Set the price surcharge.
– Delete the material.
Editing a Material: When editing a material, the following settings can be adjusted:
– Change the name.
– Modify the price surcharge.
– Define the material order.
– Activate or deactivate the material.
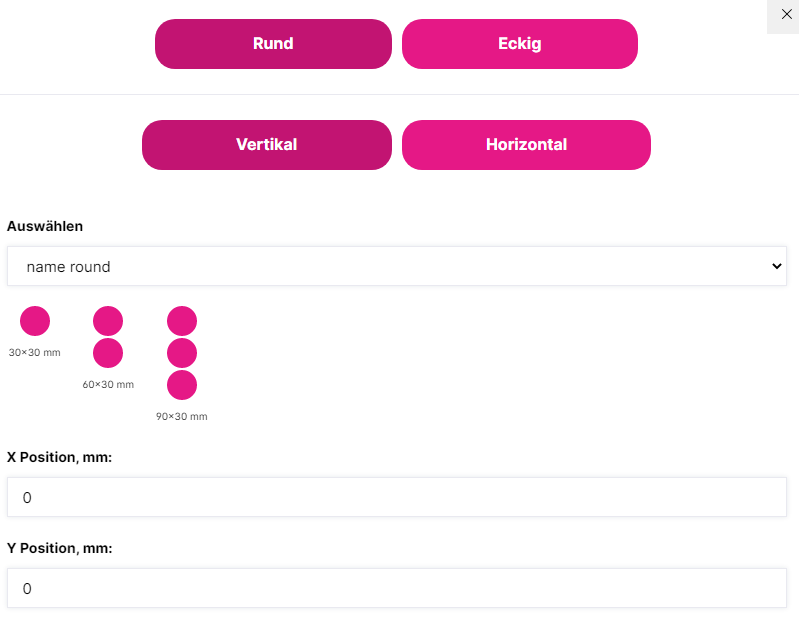
3.2. Panels:
Users are provided with the option to select the number of panels. Depending on the chosen number of panels, a dynamically calculated price surcharge is added. A ToolTip is also available above this option. Clicking on this ToolTip opens a comprehensive information description about the current option. This description includes both text and images and opens as a pop-up window.
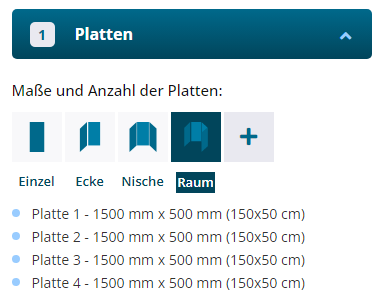
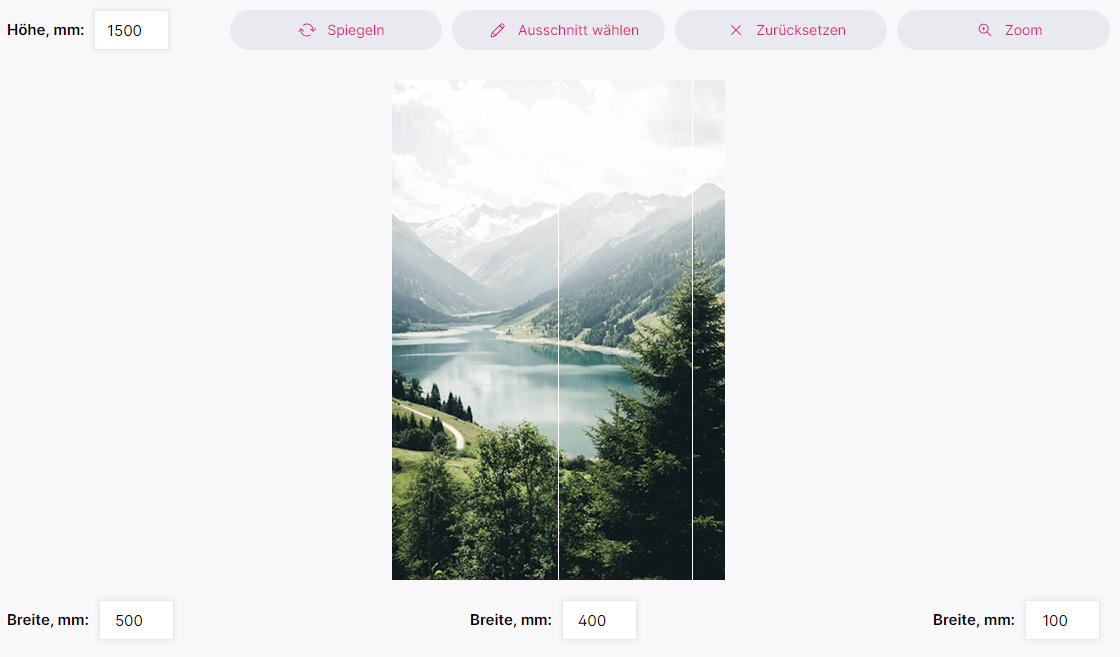
Depending on the chosen number of panels, the design is visually divided, and the end user receives a preview of the final result:
3.2.1. Panel Management
The administrator has extensive management options for panels:
Creating a New Panel: When creating a new panel, the following steps are required:
– Assign a name.
– Set the price surcharge.
– Define the number of panels.
– Delete the panel.
Editing a Panel: When editing a panel, the following settings can be adjusted:
– Change the name.
– Modify the price surcharge.
– Change the number of panels.
– Define the panel order.
– Activate or deactivate the panel.
Note:
The defined number of panels must be automatically adopted for all designs. For example, if 4 panels are defined for the selected option, the design in the user interface will be divided into 4 panels and visually represented.
3.3. Services:
Users are provided with the option to select various services. Depending on the chosen service, a dynamically calculated price surcharge is added. A ToolTip is also available above this option. Clicking on this ToolTip opens a comprehensive information description about the current option. This description includes both text and images and opens as a pop-up window.
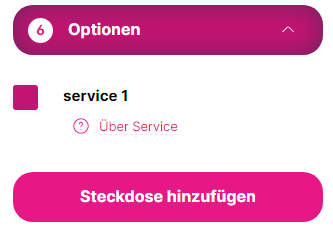
When the user selects the “Expert Cutout” option, they can define the cutouts for holes, sockets, and corners according to their preferences:
Representation in the room planner:
Functions:
Selecting Power Outlets:
The user has the option to choose from various types of power outlets:
3.3.1. Service Management
The administrator has extensive management options for services:
Creating a New Service: When creating a new service, the following steps are required:
– Assign a name.
– Set the price surcharge.
– Activate the power outlet function.
– Delete the service.
Editing a Service: When editing a service, the following settings can be adjusted:
– Change the name.
– Modify the price surcharge.
– Enable or disable the power outlet function.
– Activate or deactivate the service.
Note:
The power outlet function allows the user to define cutouts for holes and power outlets according to their individual requirements when selecting the respective service.
- Home Design Customization Area
In the home design customization area, it must be clearly visible to the end user what changes they have made, including the selected options. This means that the user can see all their customizations in real-time to get an accurate picture of what the final result will look like.

Available Options:
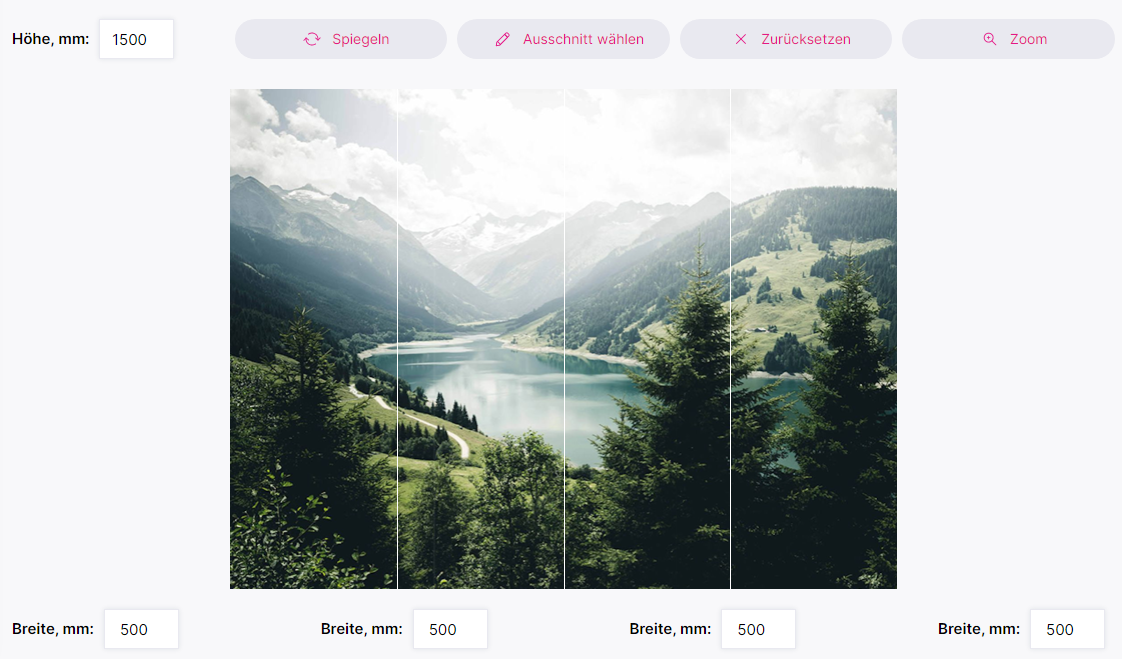
4.1. Panel Dimensions
This function is linked to the “panels” (see above).
- a) The user can define the width and height for each panel. By entering the desired dimensions, the proportions on the screen are adjusted in real-time, allowing the user to immediately see how each panel will look.
- b) Measurements must be entered in millimeters, but the dimensions are also displayed to the user in centimeters.
- c) If the user has already defined dimensions but then wants to change the number of panels, the provided values must be retained when the screen is updated.
- d) The loading time during screen updates must be optimized to ensure that results are immediately visible.
- e) The maximum and minimum values for height and width must be set by the administrator in the gallery settings.
4.2. Services
The same principle applies to services.
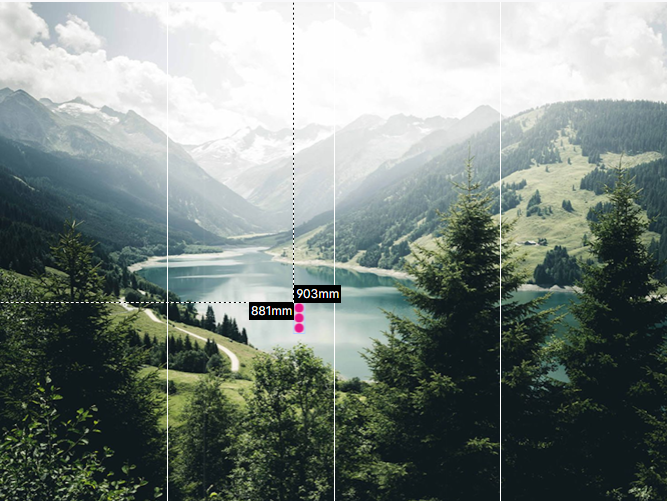
4.3. Select Cutout
When the user clicks on “Select Cutout,” a new window opens in which the user can define the desired cutout:
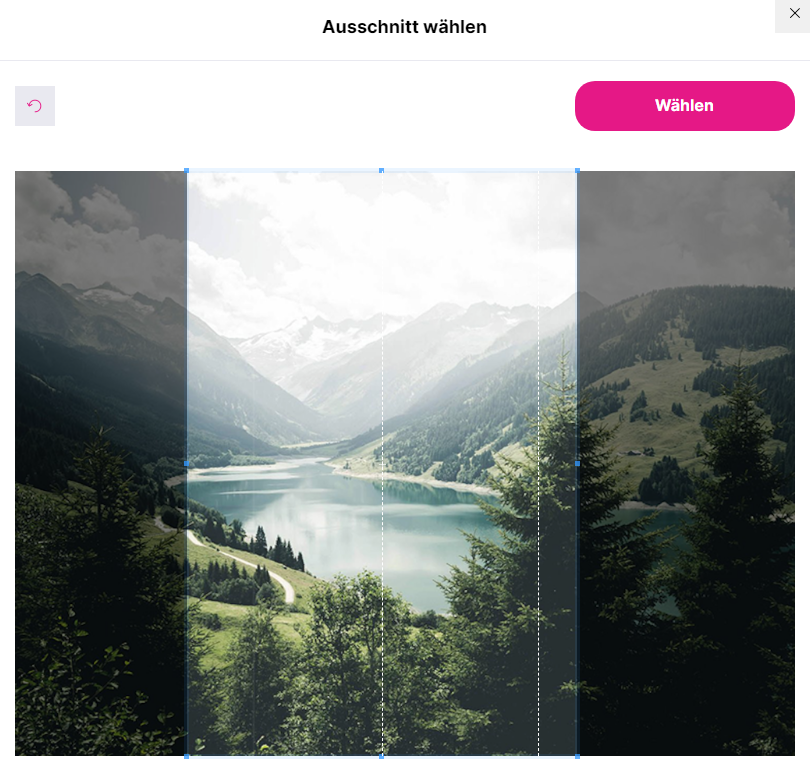
Functions:
– The user can define the cutout area using the slider.
– The position of the area to be cut can be changed by dragging with the mouse.
– By clicking “Mirror,” the user can mirror the design.
– The changes made are applied to the screen when the end user clicks “OK.”
– The minimum values for the cutout area must be set by the administrator in the gallery settings.
4.4. Reset
Pressing this button resets all previous settings.
![]()
- Shopping Cart
The shopping cart must be transparent and easily understandable for the end user. When the user changes options, the price in the shopping cart is dynamically updated.
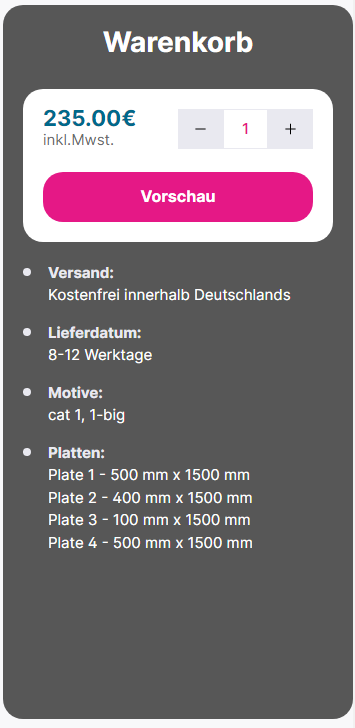
5.1. Preview
The preview option gives the end user the opportunity to visualize the designed living space:
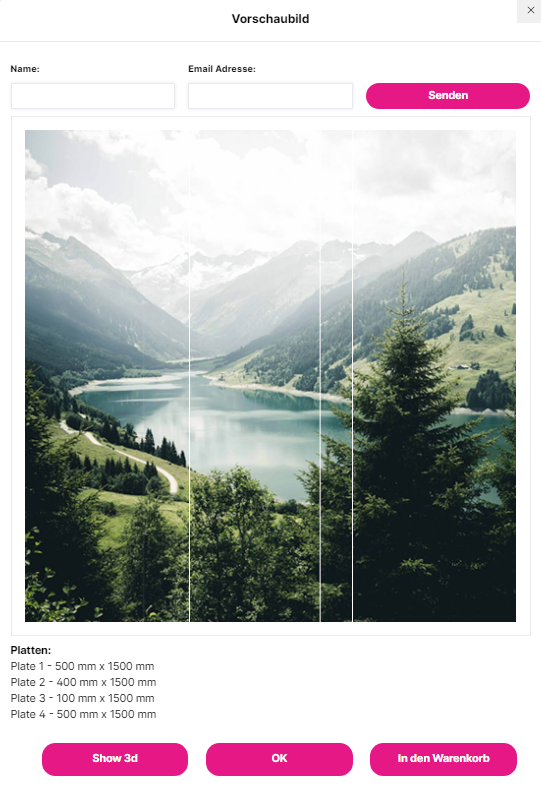
This option is also available in a 3D version:

- Checkout Area / Order Confirmation / Order
When the user adds an item to the shopping cart and proceeds to checkout, all parameters must be transferred to the checkout area, order confirmation, and order.
ATTENTION:
As mentioned earlier, the administrator must be able to download the finished design in its original size with all selected parameters.
Turn Your Visions into Reality: Online Room Design with WebiProg’s Shopware Room Planner Plugin
Do you want to offer your end users the ability to design living spaces online? WebiProg is here to assist you. With our state-of-the-art Room Planner Plugin for Shopware, we make it possible. We set up the plugin for you and customize it to your individual needs.
Our online room designer allows your customers to customize their apartments according to their preferences, whether it’s choosing materials, arranging furniture, or adding personal touches. Thanks to our tailored solution, you can expand your offerings and provide your customers with a unique experience.
Let WebiProg be your partner in exploring the world of online room design. Contact us today to learn more about how our Room Planner Plugin can take your business to the next level.